

Ever tried tweaking your WooCommerce store and felt a bit lost? You're not alone. Many store owners want to make the shopping journey smoother by sending customers straight from 'Add to Cart' to checkout. It's all about cutting down the steps and boosting those sales numbers. This guide is here to walk you through the whole process, from understanding the basics to adding some cool customizations. Let's dive in and make your store more shopper-friendly!
Key Takeaways
- Grasp the basics of the WooCommerce 'Add to Cart' button and its impact on sales.
- Learn how to change the button's URL to redirect directly to the checkout page.
- Explore plugins that can enhance and extend the button's functionality.
- Understand how to implement direct purchase buttons for a quicker checkout.
- Discover troubleshooting tips for common 'Add to Cart' and checkout issues.
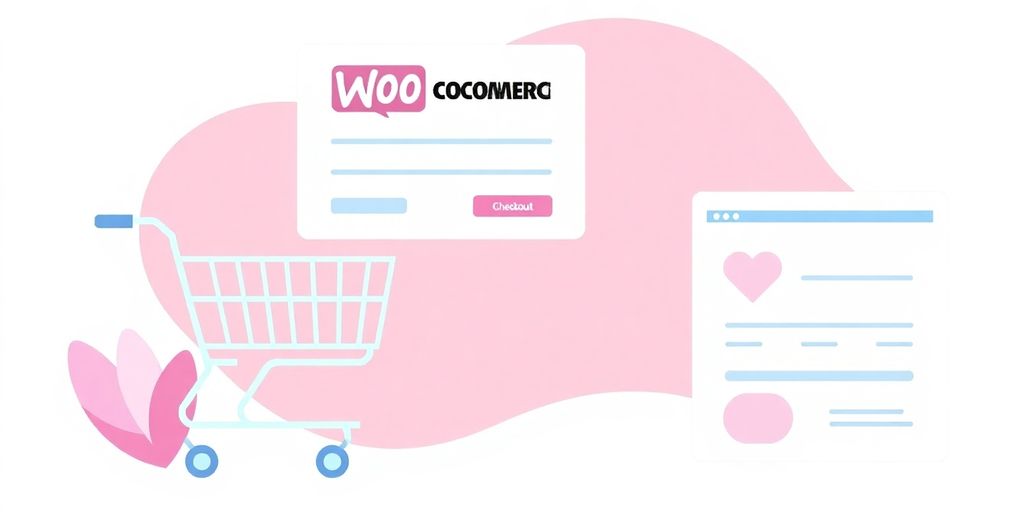
Understanding the WooCommerce Add to Cart Button
Add to Cart Button Basics
The "Add to Cart" button in WooCommerce is like the gateway for your customers to start their shopping journey. It's that little button you see on almost every product page, inviting you to add items to your cart. This button is super important because it directly impacts how easily your customers can buy stuff from your store. Understanding how it works and what you can do with it can make a big difference.
Importance of Button Placement
Where you put the "Add to Cart" button on your product page matters a lot. You want it to be easy to find, right? Usually, it’s placed near the product details, so customers don’t have to search for it. Think about it like this: if the button is hard to find, you might lose sales just because people can’t figure out how to buy your product. So, make sure it stands out and is in a spot where folks expect it to be.
Customization Options for Better UX
WooCommerce gives you a lot of freedom to tweak the "Add to Cart" button. You can change its color, size, and even what it says. Maybe you want it to say "Buy Now" instead of "Add to Cart"—you can do that! Plus, you can get fancy and change where the button takes people. For example, instead of adding an item to the cart, maybe you want to send them directly to checkout. Customizing this button can really help improve the user experience on your site, making shopping smoother and more intuitive.
Remember, the add-to-cart button in WooCommerce is crucial for customer interaction, enabling users to select and add products to their cart seamlessly. A well-placed and customized button can significantly boost your sales by making the shopping process easier for your customers.
Customizing the Add to Cart Button for Better User Experience
Changing the Button URL with Filters
Alright, so you want to tweak the "Add to Cart" button, huh? It's easier than you might think. With WooCommerce, you can change the button's URL using filters. This means when a customer clicks "Add to Cart," they can be redirected to another page, like a special offer or even directly to checkout. Here's how you can do it:
- Access your theme's functions.php file: This is where the magic happens. You can add custom PHP code here.
- Use the
add_filterfunction: This WordPress function allows you to modify the default behavior of the "Add to Cart" button. - Test your changes: Always make sure everything works as expected. Check on different devices and browsers to avoid any hiccups.
Redirecting to Checkout Page
Sometimes, you just want to skip the cart altogether, right? Redirecting users straight to the checkout page can streamline the buying process, cutting down on clicks and making it easier for customers to complete their purchase. Here's a quick way to do it:
- Modify the button's link: Use PHP to change the destination URL of the "Add to Cart" button.
- Ensure compatibility: Double-check that your theme and plugins play nice with this change.
- Monitor performance: Keep an eye on how this affects your conversion rates.
Using Plugins for Extended Capabilities
Not a fan of coding? No worries. There are plenty of plugins out there that can help you customize the "Add to Cart" button without writing a single line of code. These plugins can offer features like:
- Button styling: Change colors, fonts, and sizes to make the button pop.
- Dynamic redirects: Set different redirect URLs based on product categories or user roles.
- Analytics integration: Track how often the button is clicked and optimize accordingly.
Pro Tip: Customizing your "Add to Cart" button can significantly enhance your store's user experience. A custom 'Add to Cart button' in WooCommerce enables store owners to tailor the look and functionality of their product pages, enhancing the shopping experience. This little tweak could be the boost your online store needs to increase conversions and keep customers coming back for more.
Implementing Direct Purchase Buttons for Streamlined Shopping

Creating a Direct Purchase Button
Alright, so you're looking to speed things up for your customers, right? Implementing a direct purchase button can be a game changer for your store. This nifty little feature lets your customers skip the cart and head straight to checkout, saving them time and effort. Here's how you can set it up:
- Find the Product ID: First off, you need to know the product ID for the item you're focusing on. This ID is crucial for creating the link.
- Create the URL: Use this URL structure:
https://yoursite.com/checkout/?add-to-cart=ID, replacingIDwith your product's ID. This link will take customers directly to the checkout page with the product already added. - Add the Button: Now, just place a custom button on your product page using this link. It’s as simple as that!
Using Product IDs for Direct Checkout
Once you've got the hang of creating direct purchase buttons, the next step is mastering product IDs. Each product in WooCommerce has a unique ID, and knowing how to use this can help you customize the shopping journey:
- Locate the ID: You can find the product ID in your WooCommerce dashboard under the "Products" section.
- Apply It: Use this ID in your direct purchase URL to ensure the right product is added to the checkout.
- Test It: Always test your links to make sure they work as intended before going live.
Benefits of Skipping the Cart
Why would you want to skip the cart, you ask? Well, there are some pretty solid reasons:
- Faster Checkout: Direct purchase buttons make the checkout process quicker, which can lead to more sales.
- Less Abandonment: With fewer steps, there's less chance for customers to change their minds.
- Improved User Experience: Customers appreciate a straightforward, hassle-free shopping experience.
Implementing direct purchase buttons in your WooCommerce store can not only enhance the shopping experience but also boost your conversion rates. By reducing the steps needed to complete a purchase, you're making it easier for customers to say "yes" to buying your products.
For more details on enhancing your WooCommerce direct checkout process, check out guides that explain how to streamline both checkout and cart interactions for a smoother customer journey.
Optimizing the Checkout Process with WooCommerce Shortcodes
Using WooCommerce Cart Shortcode
Alright, let's talk about the WooCommerce cart shortcode. It's like having a magic tool in your toolbox. You can pop your shopping cart anywhere on your site with this shortcode. Imagine the ease for your customers when they can check their cart without hunting for it. This makes shopping smoother and keeps folks from wandering off to another site. Want to make it even better? Try these:
- Create a custom cart page with the shortcode.
- Position it where it's super easy to find.
- Keep your design clean and simple.
Enhancing Checkout with Shortcodes
Now, onto the checkout shortcode. This one's a game-changer. You can craft a unique checkout page that stands out. Toss in some discount codes or eye-catching banners to keep things lively. Here's how you can make the most of it:
- Use the checkout shortcode to design a page that's all about your brand.
- Add elements like promo codes or banners for that extra flair.
- Combine cart and checkout shortcodes on one page for a seamless experience.
Improving Navigation and Product Display
Navigation and product display can make or break an online store. With shortcodes, you can tidy up product displays and make navigation a breeze. Think of it like setting up a store where everything's easy to find and looks great. Here's what you can do:
- Use shortcodes to organize product displays neatly.
- Ensure navigation is intuitive and straightforward.
- Keep testing and tweaking to see what works best.
Shortcodes are your secret weapon in making your WooCommerce store a joy to shop at. By getting creative and staying flexible, you can keep your customers happy and wanting more.
For more tips on creating, customizing, and optimizing your checkout page, check out this guide.
Troubleshooting Common Issues with Add to Cart and Checkout
Identifying and Fixing Redirect Errors
Redirect errors can be a real headache, especially when they mess with your checkout flow. These issues often stem from server misconfigurations or conflicts with JavaScript. To tackle this, start by checking your server settings. Make sure URLs are correctly defined and that there are no typos or incorrect paths. If you're using plugins, disable them one by one to see if any are causing the trouble. It's also wise to clear your site cache to rule out cached errors.
Ensuring Compatibility with Themes and Plugins
WooCommerce is great, but it doesn't always play nice with others. Compatibility issues with themes and plugins can make your WooCommerce checkout problems a nightmare. Here's a simple way to check: deactivate all plugins except WooCommerce, and switch to a default WordPress theme like Twenty Twenty-One. If the problem disappears, reactivate each plugin one by one and switch back to your original theme, testing the checkout each time. This helps pinpoint the culprit. Once you find the issue, check for updates or support threads that might have a fix.
Best Practices for Seamless Functionality
To keep your WooCommerce store running smoothly, follow these best practices:
- Regularly update WooCommerce, themes, and plugins to their latest versions.
- Back up your site before making any major changes.
- Test changes in a staging environment before going live.
Staying on top of updates and testing changes can save you a ton of headaches down the road. It’s all about keeping things simple and effective.
Boosting Conversions with Strategic Add to Cart Customizations
Leveraging Upsell Opportunities
Alright, let's talk about upselling. It's not just about pushing more products; it's about offering the right products at the right time. For instance, when a customer adds a laptop to their cart, you might suggest a matching laptop bag or a wireless mouse. This isn't just a sales tactic; it's about enhancing the shopping experience. By strategically placing these upsell suggestions, you can increase your average order value without being pushy.
Here's a simple way to get started:
- Identify products that naturally complement each other.
- Use WooCommerce's built-in features to set up product recommendations.
- Regularly review your upsell strategies to see what's working and tweak as needed.
Enhancing Button Visibility and Appeal
The Add to Cart button is your store's silent salesperson, so it needs to stand out. A button that's easy to spot and looks inviting can make a huge difference. Think about using contrasting colors that catch the eye but still fit your brand's aesthetic. Also, consider the size and placement—make sure it's not too small or tucked away in a corner.
- Test different color schemes to see which ones get more clicks.
- Ensure the button's text is clear and action-oriented, like "Add to Cart Now!"
- Place it prominently on the page so customers can't miss it.
Analyzing Conversion Data for Improvements
Data analysis might sound dull, but it's a goldmine for boosting sales. Dive into your analytics to understand customer behavior. What products are they adding to their cart? Where are they dropping off?
Regularly monitoring your cart page performance can reveal insights that lead to better shopping experiences. This guide presents three methods to improve your WooCommerce cart page.
Here's what you can do:
- Use tools like Google Analytics to track user interactions.
- Identify patterns that indicate where customers lose interest.
- Adjust your site layout or product offerings based on these insights.
By making these strategic tweaks, you're not just improving your site; you're crafting a shopping experience that keeps customers coming back.
Preparing Your WooCommerce Store for Customization
Setting Up a Child Theme
So, you're ready to dive into customizing your WooCommerce store? Awesome! But first things first, you need to set up a child theme. This is crucial because it protects your customizations from getting wiped out during theme updates. Think of it as a safety net for all the tweaks you're about to make.
Here's how you can create a child theme:
- Access Your Files: Use an FTP client or your hosting service's file manager to get into your WordPress files.
- Find the Right Directory: Head over to the
wp-content/themesfolder. - Create a New Folder: Make a new folder for your child theme. Name it something like
twentynineteen-childif you're using the Twenty Nineteen theme. - Add a Style File: Inside your new folder, create a
style.cssfile. - Add the Header Comment: Include the necessary header comment at the top of your
style.cssfile to link it to the parent theme.
Backing Up Your WordPress Site
Before you start tinkering with your site, make sure you back it up. Trust me, you don't want to lose all your hard work if something goes sideways. You can use plugins like UpdraftPlus or BackWPup to easily back up your site.
Testing Changes in a Staging Environment
Alright, now that you've got your child theme and backup, let's talk about testing changes. You don't want to make changes directly on your live site, do you? That's where a staging environment comes in handy. It's like a playground for your website where you can test all your changes without any risk.
Here's how to set up a staging environment:
- Check Your Hosting: Many hosting providers offer one-click staging setups. Check your hosting dashboard or reach out to support.
- Use a Plugin: If your host doesn't provide staging, plugins like WP Staging or Duplicator can help you set one up.
- Manual Setup: Alternatively, you can manually create a staging site by copying your WordPress files and database to a subdomain or subdirectory.
Remember, taking these steps ensures your WooCommerce store is ready for all the customizations you plan to make. It might seem like a hassle now, but it'll save you a headache later on. Happy customizing!
To get your WooCommerce store ready for changes, start by making sure everything is set up correctly. Check your settings, themes, and plugins to ensure they work well together. This will help you avoid problems later on. If you want to learn more about customizing your store, visit our website for helpful tips and tools!
Wrapping It Up
Alright, so there you have it! Tweaking the "Add to Cart" button and setting up a direct route to checkout in WooCommerce isn't just a techy task—it's a game-changer for your online store. By making these changes, you're not only smoothing out the shopping journey for your customers but also giving your sales a nice little nudge. Remember, it's all about making things easy and quick for the shopper. So, go ahead, try out these tips, and watch your store become a favorite stop for your customers. Happy selling!
Frequently Asked Questions
How do I change the Add to Cart button link in WooCommerce?
To change the Add to Cart button link, you need to edit your theme’s functions.php file. Use the add_filter function to modify the button URL to your desired link.
What are the benefits of redirecting to the checkout page immediately?
Redirecting to the checkout page can speed up the buying process, making it easier and faster for customers to complete their purchase, which can lead to higher sales.
How can I add a direct purchase button in WooCommerce?
You can create a direct purchase button by using the product ID in a custom URL format: https://yoursite.com/checkout/?add-to-cart=ID, where ID is the product ID.
Why is the placement of the Add to Cart button important?
The placement is crucial because it needs to be easily visible and accessible to encourage customers to add items to their cart, which can improve sales.
What should I do if my Add to Cart button isn’t working?
First, check for any plugin or theme conflicts. Ensure that your WooCommerce and WordPress versions are up to date. You might also want to try disabling plugins one by one to identify the issue.
How can I enhance the Add to Cart button’s appearance?
You can enhance its appearance by changing its color, size, and text to make it more appealing and noticeable. Use the customization options in WooCommerce or add custom CSS to your theme.